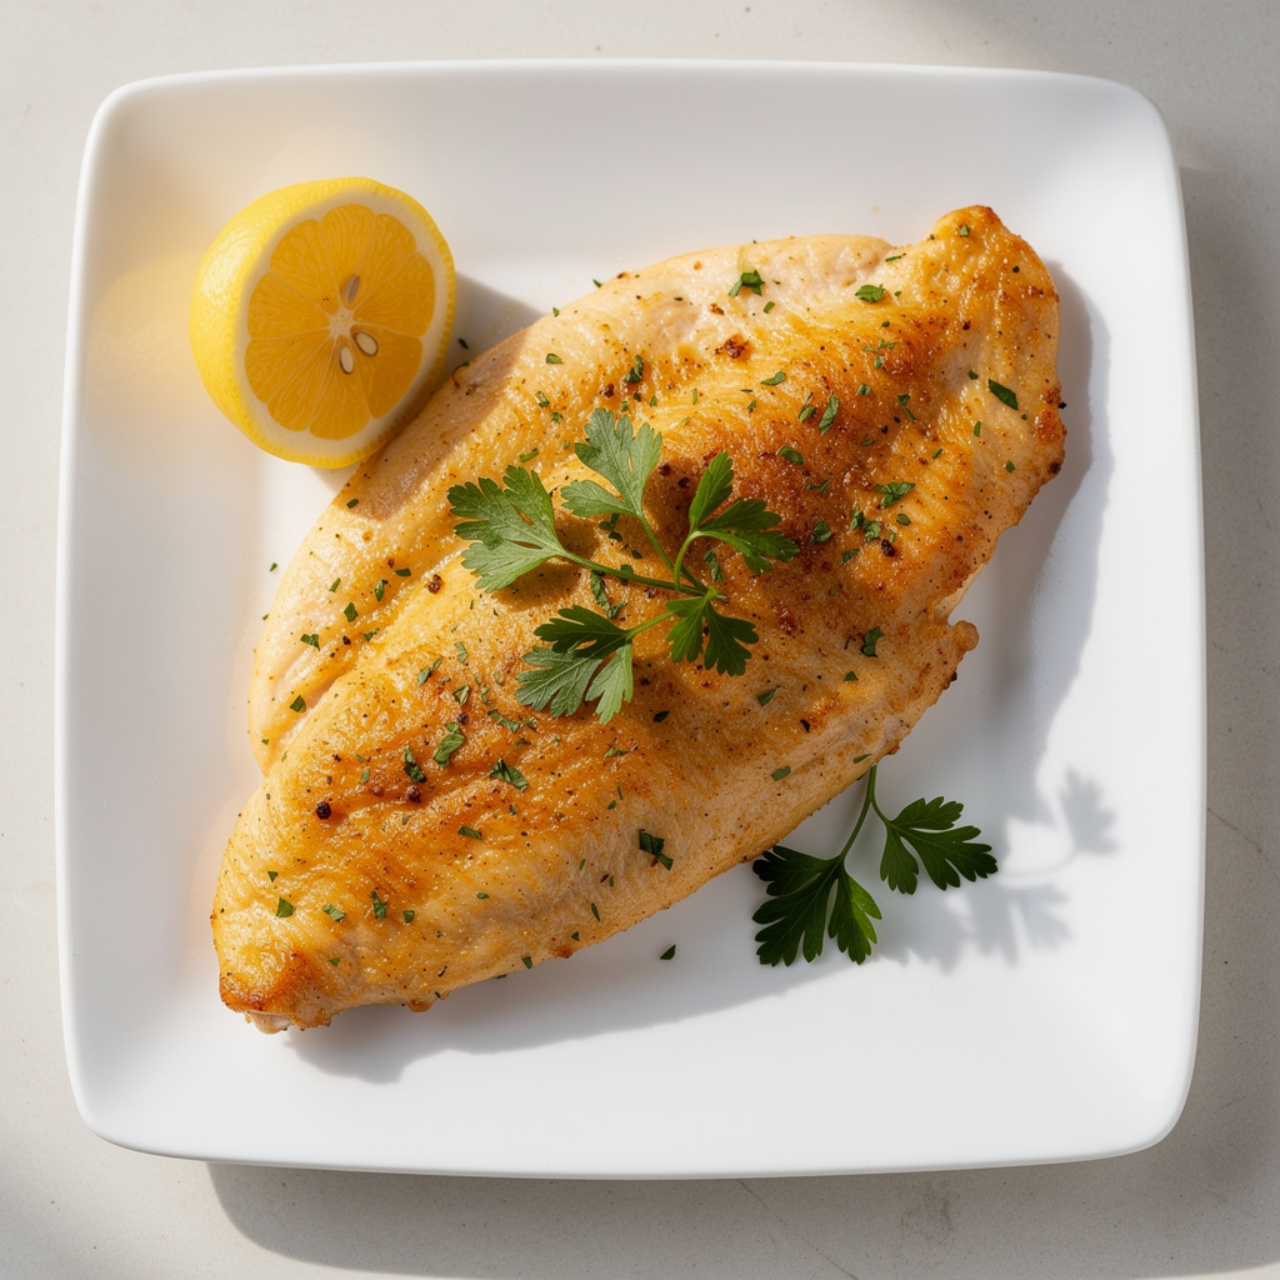
Crispy Breaded Chicken Tenders (Baked, Not Fried!)
These crispy baked breaded chicken tenders are golden, juicy, and incredibly easy to make at home with simple pantry staples. The best homemade chicken tenders you'll ever taste, no frying required!

The Only Breaded Chicken Tender Recipe You Will Ever Need
Let's be honest. Chicken tenders are one of life's great comfort foods. Whether you are feeding picky kids on a Tuesday night, meal prepping for the week, or just craving something golden, crunchy, and satisfying, a great homemade breaded chicken recipe hits differently than anything from a freezer bag or a drive-through window.
This recipe for crispy baked breaded chicken tenders delivers everything you love about the classic: a shatteringly crunchy exterior, impossibly juicy chicken inside, and that deeply seasoned, savory flavor that makes you reach for just one more. The best part? They are baked, not fried, which means less mess and no bubbling vat of hot oil on your stovetop.
I have been making these baked chicken breast tenderloins for years, and this version is the most refined, most reliable, and most delicious iteration I have ever landed on. Once you try homemade breaded chicken done right, you will never go back.
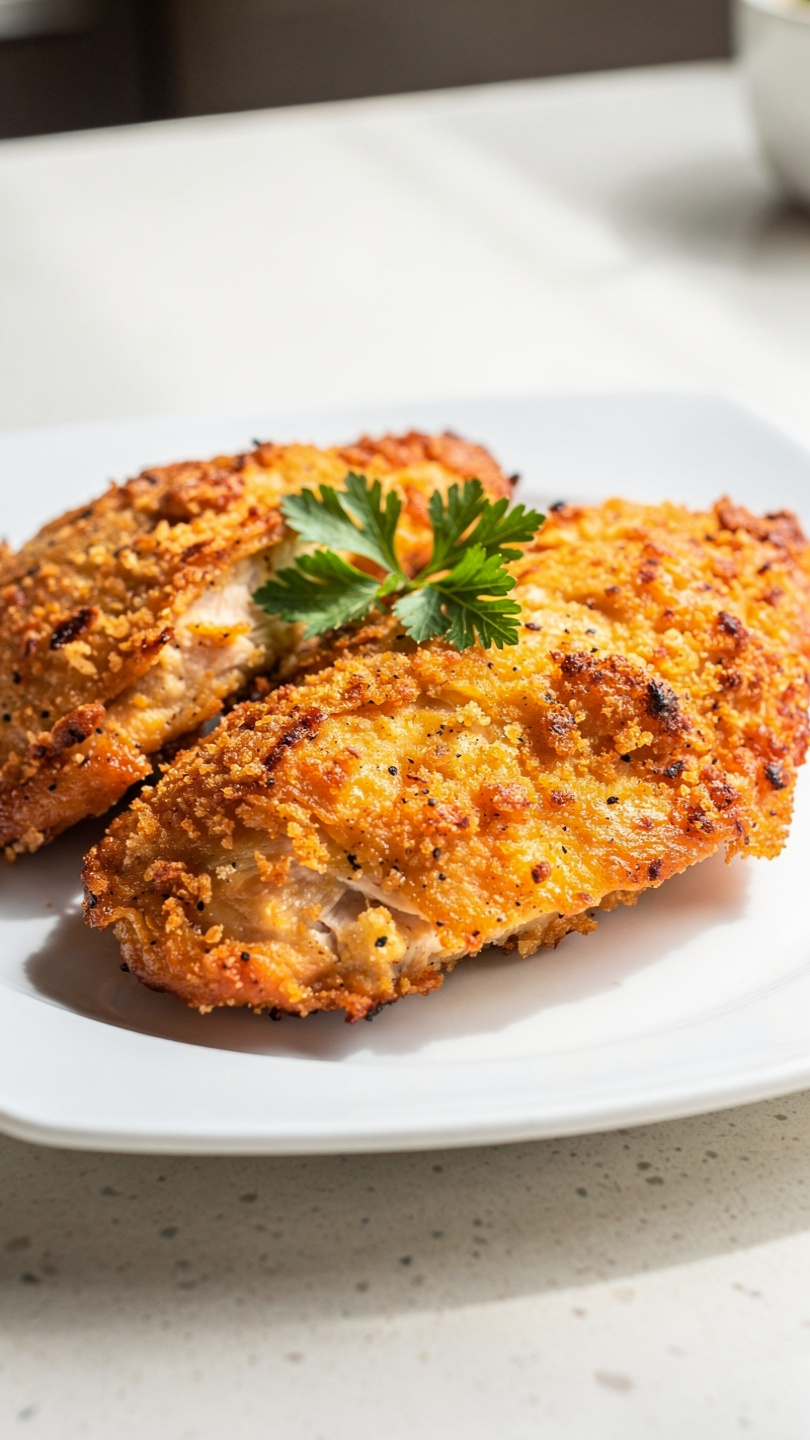
Why These Baked Chicken Tenders Are So Crispy
The secret to getting a genuinely crispy baked coating comes down to three non-negotiable techniques:
- Panko breadcrumbs, not regular. Panko has a coarser, airier texture that crisps up beautifully in a hot oven.
- A wire rack on the baking sheet. Elevating the tenders allows hot air to circulate completely around each piece, crisping the bottom just as well as the top.
- Olive oil spray. A generous coating of oil on the breadcrumbs mimics the crisping effect of frying without any of the fuss.
Skip any one of these, and you will end up with something pale and soft instead of golden and crunchy. Follow all three, and the results are genuinely impressive.
Chef's Tip: For next-level crispiness, toast your panko in a dry skillet over medium heat for 2 to 3 minutes before using it in the breading station. Pre-toasted panko starts the baking process already golden, giving you a dramatically crunchier final crust.
What You Will Need: Tools and Ingredients
Getting the coating right matters more than almost anything else in this recipe, and the right tools genuinely make a difference here. A good oven-safe wire rack, a reliable meat thermometer, and a few wide shallow bowls for your breading station will set you up for success every single time.
On the ingredient side, the star player in the seasoning mix is smoked paprika. It adds a subtle warmth and a gorgeous copper color to the crust that regular paprika simply cannot match. A spoonful of Dijon mustard mixed into the egg wash is another quiet upgrade that adds depth, helps the breading stick, and brings a gentle tang that makes the whole thing taste more complex without any extra effort.
Simple Breaded Chicken Recipes Start With Good Chicken
This recipe is written for chicken tenderloins, which are the small, naturally tender strips found underneath the chicken breast. They cook quickly and evenly, making them ideal for this kind of recipe.
That said, chicken breast tenders cut from a boneless, skinless breast work just as well. If you go that route, aim for strips about 1 inch wide and 4 to 5 inches long. Thicker pieces will need an extra 3 to 4 minutes of bake time, so keep your thermometer handy.
A few other tips before you start:
- Pat the chicken dry. Moisture is the enemy of a crispy crust. Spend 30 seconds with paper towels and you will notice the difference.
- Press the breadcrumbs on firmly. Do not just roll the chicken through the panko. Use your fingers to press the coating into every surface.
- Do not crowd the pan. Give each tender a little breathing room. Crowding creates steam, and steam is the enemy of crunch.
Building Your Breading Station
Every great breaded chicken tender recipe uses a three-step breading station:
- Flour seasoned with salt and pepper (creates a dry base for the egg to cling to)
- Egg and Dijon wash (the adhesive layer)
- Panko and Parmesan mixture (the crunchy, flavorful exterior)
The flour step is one that home cooks often skip, but it matters. A thin coat of flour absorbs any remaining surface moisture on the chicken and gives the egg wash a slightly tacky surface to grip. Without it, the breading slides off during baking.
Ready to bring it all together? Here is the full step-by-step recipe:
Crispy Breaded Chicken Tenders (Baked, Not Fried!)
These crispy baked breaded chicken tenders are golden, juicy, and incredibly easy to make at home with simple pantry staples. The best homemade chicken tenders you'll ever taste, no frying required!
Ingredients
- 1 1/2 lb chicken tenderloins, patted dry
- 1 1/2 cups panko breadcrumbs
- 3/8 cup grated Parmesan cheese, finely grated
- 1 tsp garlic powder
- 1 tsp smoked paprika
- 1/2 tsp onion powder
- 1/2 tsp dried Italian seasoning
- 3/4 tsp kosher salt, divided
- 1/2 tsp black pepper, freshly ground
- 2 large eggs, beaten
- 1 tbsp Dijon mustard
- 1/2 cup all-purpose flour
- 1 tbsp olive oil spray, or cooking spray
Instruction
Preheat your oven to 425 degrees F (220 degrees C). Line a large baking sheet with a wire rack and lightly coat it with cooking spray. Using a wire rack is key to getting all-around crispiness without flipping.
Set up your breading station with three shallow bowls. In the first bowl, add the flour and a pinch of salt and pepper. In the second bowl, whisk together the eggs and Dijon mustard until fully combined. In the third bowl, mix the panko breadcrumbs, Parmesan, garlic powder, smoked paprika, onion powder, Italian seasoning, remaining salt, and black pepper.
Pat the chicken tenderloins completely dry with paper towels. This step is critical for the coating to stick and for maximum crispiness.
Working one at a time, dredge each tenderloin in the flour, shaking off any excess. Dip it into the egg mixture, letting the excess drip off. Then press it firmly into the panko mixture, turning and pressing so the breadcrumbs adhere to all sides.
Place the breaded chicken tenders in a single layer on the prepared wire rack. Make sure none of them are touching each other. Spray the tops generously with olive oil spray.
Bake for 20 to 22 minutes, until the crust is deep golden brown and the internal temperature of the chicken reaches 165 degrees F (74 degrees C). Do not flip them during baking.
Let the tenders rest for 3 to 5 minutes before serving. This allows the juices to redistribute and keeps the coating from sliding off when you bite in.
Equipment
- Large baking sheet
- Wire rack (oven-safe)
- 3 shallow bowls (for breading station)
- Meat thermometer
- Paper towels
- Cooking spray or olive oil spray
Notes
How to Serve These Chicken Tenderloins for Dinner
These chicken tenderloin recipes for dinner are endlessly flexible. Here are a few of my favorite ways to serve them:
- Classic: Honey mustard, ranch, or BBQ sauce on the side with a simple green salad
- Comfort food night: Mac and cheese, coleslaw, and pickles
- Light and fresh: Sliced over a Caesar salad with shaved Parmesan
- Kid-friendly: In a soft roll with lettuce, pickles, and a drizzle of hot sauce
They are also fantastic tucked into a wrap for lunch the next day. Leftovers reheat like a dream in the air fryer or a hot oven in under 10 minutes, making them a genuinely great meal-prep option for busy weeks.
Storage Note: Keep leftovers in an airtight container in the fridge for up to 3 days. For crispy reheated tenders every time, use a 375 degrees F oven or air fryer. Avoid the microwave.
Final Thoughts
When it comes to simple breaded chicken recipes, the goal is always the same: golden outside, juicy inside, seasoned all the way through. This recipe checks every single box. With pantry staples, one baking sheet, and about 35 minutes of your time, you have a crowd-pleasing, restaurant-quality dinner on the table that the whole family will request again and again.
If you try this recipe, I would love to hear how it turned out. Leave a comment below and let me know what dipping sauce you paired it with!